Blog
True love for great sound unites us.
Blog
True love for great sound unites us.
It’s time to take your guitar playing to the next level and record your music. We’re here to help.
You’ve practiced, you’ve improved, you’ve jammed, you’ve perfected your playing? Now it’s time to take it to the next level and record your music.
That’s the first step on your way to becoming a rock god. We’re here to help you on your way.
You might have seen pictures of professional recording studios with an endless amount of recording equipment. Don’t be intimidated; they also brew their beer with (dirty) water.
In this blog, we’ll have a look at four different ways to record your electric guitar.
Professionalism is not necessarily about having the most expensive equipment at hand. It’s rather the mindset of making every detail count with the means you have at hand.
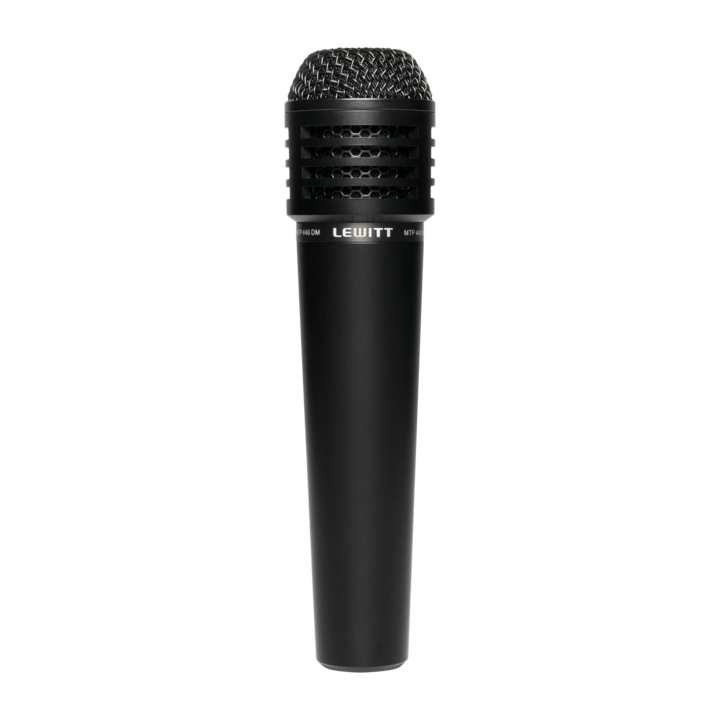
First, you'll hear the dynamic mic (MTP 440 DM), then the condenser (LCT 640 TS). We've also added samples using the amp with a load box and a Greenback® impulse response. The last two samples feature a guitar sim that comes with Logic.
Since a computer or laptop has become a household item, we can produce high-level guitar recordings at home.
Of course, infinite power is always the gateway to an endless history of tinkering and tweaking around, mostly at the expense of the time one should spend on performing or practicing our riffs. If you don’t (yet) know what I am talking about, good for you. Here’s what you’ll need for most guitar recording scenarios.
Additional or optional
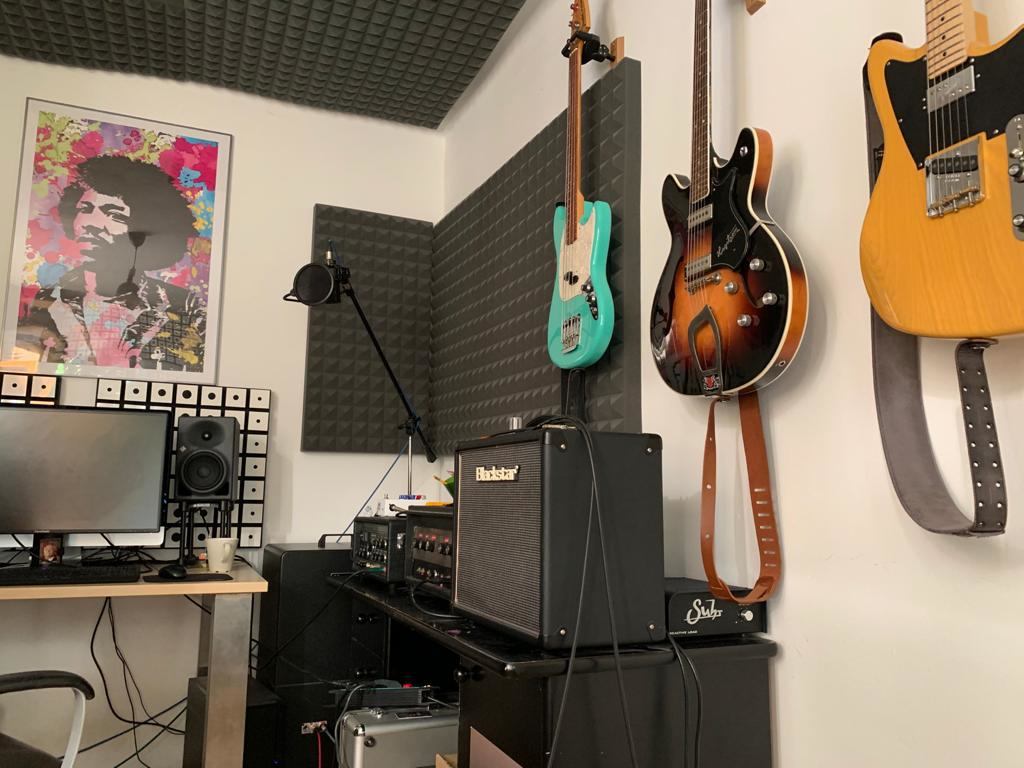
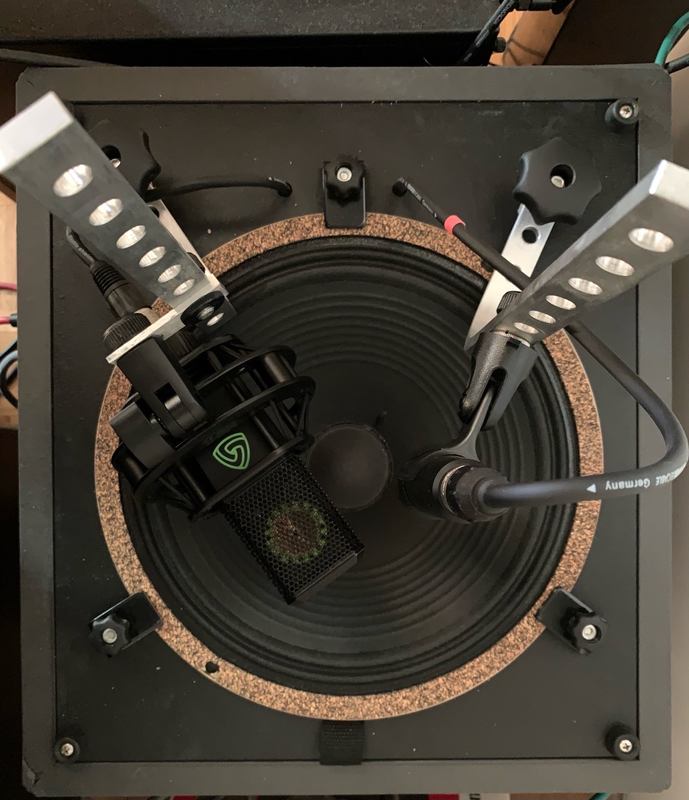
Here’s the most basic recording chain to record your guitar amplifier with a microphone.
Guitar –> Cable –> Amp –> Cab -> Microphone –> Cable –> Audio Interface –> Computer
Set up your recording chain
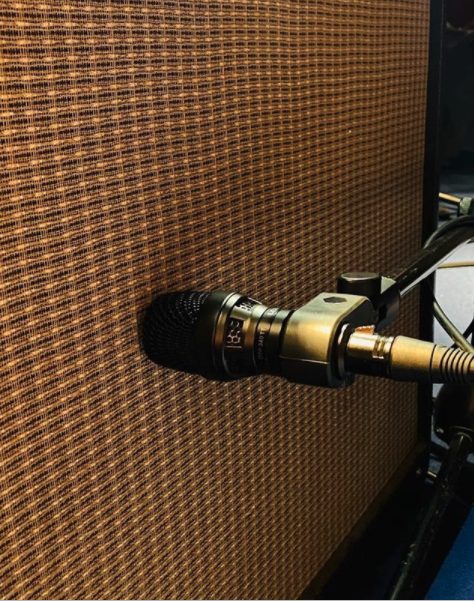
First, you can mic any speaker cabinet regardless of its size. If you are using a single mic, you can only record one speaker anyways. It's also good to know, that the speaker choice has a bigger influence on your tone than the size of the cabinet.
Second, take your time to adjust the tone on your amplifier.
Start by pointing the mic directly at the cone of the speaker at a 90° angle. As this gives you the most amount of treble, you can now gradually move the mic off-axis to reduce high-frequency content until you're satisfied.
Use a flashlight if you can't see the speaker through the grill material.
Activate the direct monitoring function of your audio interface to listen to your microphone signal without recording. This helps to find the right sound quickly.
When you position the microphone close to the amplifier, the room you play in will not noticeably affect your recording since the direct sound is predominant.
Record a few takes and listen to the recordings. Get the tone right at the beginning, and you’ll save time later!
Make adjustments to the microphone position if you’re not 100% happy. Be creative, and don’t stop until you’ve got the tone you’re looking for.
Put the amp on a carpet, or put some other soft material underneath it to avoid rattling noises, etc.
The microphone is key to your tone as it is your speaker choice! These two factors heavily interact with each other, but since there are a lot of standard speakers, it's easy to grasp what works with what.
Dynamic microphones:
+ Great for close-miking, easy to handle
Condenser microphones:
+ Detail-rich sound
+ Typically combined with a dynamic mic
A typical choice for a single mic setup is a dynamic microphone like the MTP 440 DM. I personally also like the Sennheiser MD421 but found that they sound very similar to the DTP 340 TT, which is just less expensive. The classics like the SM57 or E906 are solid choices as well.
The sound samples that you heard at the top, featured the LCT 640 TS and the MTP 440 DM.

If you have problems with high volumes or the room acoustics, but still want to use your favorite microphone-speaker combination, you can use an isolation cabinet. An isolation cabinet (iso cab) allows you to mount your favorite microphone speaker combination inside a box.
An iso cab is perfect for home recording enthusiasts that want to have the “real deal” but are not able to crank the volume as they wish.
You can find several tutorials online on how to build your own DIY solution, but they're also manufacturers offering a professional solution, e.g., Grossman, Randall, etc.
The guitar recording world has come up with a new and very effective way of combining the analog and the digital domain.
Today, you can use your amplifier and the tone you’ll get from it and combine it with digital fingerprints of a room-microphone-cabinet combination widely known as impulse responses or IR.
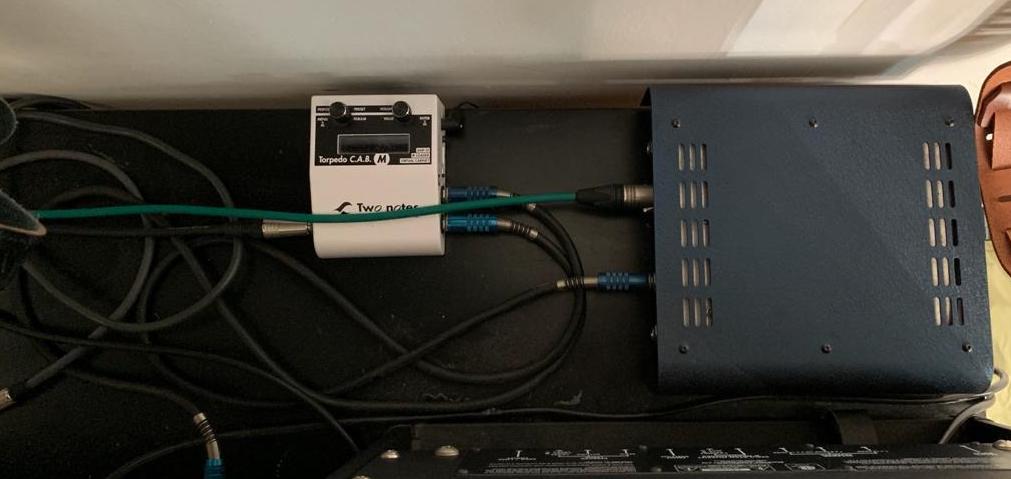
The (reactive) load box replaces the speaker and emulates its impedance. This ensures that the amplifier reacts to your playing as if it would normally do.
It connects to your amplifier via a standard TS speaker cable. The signal can then be sent to your audio interface and recorded in your DAW.
There are many different models available, the Suhr Load and the Torpedo Captor by Two Notes are some of the great ones.
Please make sure that the load box matches the impedance of the speaker that you usually use (4, 8, or 16 Ohm). Use a “reactive” load to keep the natural playing feel. Never ever use a tube amplifier without a connected speaker cabinet or a load box.
Fun fact: Thibaud, one of our software engineers, went to school with Two Notes CEO Guillaume Pille.
But you’ll need one more thing to make the signal also sound like a speaker. This is called the impulse response. You can either use a specific device to load an impulse response or you can do it in the DAW.
Generally speaking, the impulse response is the measurement (recording) of an output reacting to a (short) signal.
In the guitar world, the impulse response is the result of a measurement taking three things into consideration: the room, the speaker, and the microphone (position).
Impulse responses are short .wav files. They are like a digital fingerprint that you can use to emulate a recording scenario.
You can find a lot of free IR loader plugins on the internet. Just insert the plugin on your audio channel and insert the .wav file of your impulse response. There is a huge variety of impulse responses provided by enthusiasts or highly professional studios specialized in producing the recording best experience. The following recording chain is for using an IR with a load box setup.
If you think, ok, all the things mentioned are too much for me, there is also a simpler solution.
Just plug your electric guitar into your audio interface and go fully digital.
Make sure that the input on your interface is set to Hi-Z, which stands for high impedance. Some audio interfaces feat. a dedicated guitar input.

I go fully digital when I want to quickly capture my ideas.
The quality really has improved over the last couple of years, and many of my friends use software-only guitar recording chains, e.g., Neural DSP, Bias FX, or the Line6 Helix Native plugin.

In the beginning, these things can seem a bit overwhelming. But the most important thing is just to get started and try them out. With a few adjustments, you will quickly get a good sound. The technical possibilities that are available to us today go far beyond what we are used to from our favorite albums.
If you have a specific question, you can also send us a message.
It was my friend Damian aka Macadamian who composed and wrote the guitar part - they're taken from his song "Hardcore". You can listen to his full EP "I" online. Just follow the links below.
Listen to Macadamian on Spotify
Related stories
![[Photo © Ola Englund]](https://d2pucgucjvdva3.cloudfront.net/sites/default/files/styles/t43_s/public/2018-09/olaenglundphoto.jpg)
Heavy guitar mic shoot out with Ola Englund
Ola Englund, Swedish guitarist, producer, and YouTuber tries out different LEWITT mics. Check out the solid 6/10 video.
How to mix electric guitars live
In this blog, I’m going to help you get the guitar sound you want in a live setting.

Microphone polar patterns
It is essential to know polar patterns to get the perfect recording out of your microphone. Here you'll learn everything you need to call yourself a pro.
Top 10 tips for recording vocals in a home studio
Vocals can make or break a song. Having a compelling vocal sound is critical to pulling in the listener and getting them to connect with your song. These are my…