
Blog
Blog
In a world where digital communication has become so important, getting your message across in an intelligible way can sometimes be challenging. Audio quality can drastically affect the likelihood that those on the other end of the line remain engaged and hold on to your every word.
Why? Because when it’s bad… it’s unbearable. There is a lot of research out there on the science of audience engagement, and auditory queues and speech comprehensibility play a very significant role in making sure your viewers remain on the call/ stream.
Let us firstly agree that good audio quality in a video chat or stream comes down to several essential factors. This can make diagnosing the source of a bad connection difficult. Is it my microphone? Why is there feedback? Is it a poor connection? Etc. Let’s take a look at some common factors that generally come hand in hand with a bad transmission.

1. Pick the right environment
Although it may not always be possible to seek out an isolated and acoustically treated vocal booth to conduct your video chat/skype interview, it does indeed help to pay attention to the environment in which you conduct your call.
Background noise is one factor to be aware of, and reverberation is the other.
If you are in a loud or noisy environment such as a street or in a café – almost everything you hear around, you will bleed into the recording and get delivered to the other side of the call—this a big no-no for anyone on the other end. Look for a quiet place to set up and conduct your interview/ stream.
2. Keep your distance to the mic minimal
The distance of your voice to the mic also impacts the intelligibility of your call. This is because of what we refer to as ‘Critical distance’. Critical distance is the radius where the direct signal becomes less loud than the reverberant field of the room.
In layman’s terms, this just means that you start hearing more of the room and its reverb at a certain distance to the mic, which makes it harder to understand what is being said.
Using a directional microphone with a cardioid pattern, for example, helps to reduce the presence of reverb in your signal and put a focus on your voice.
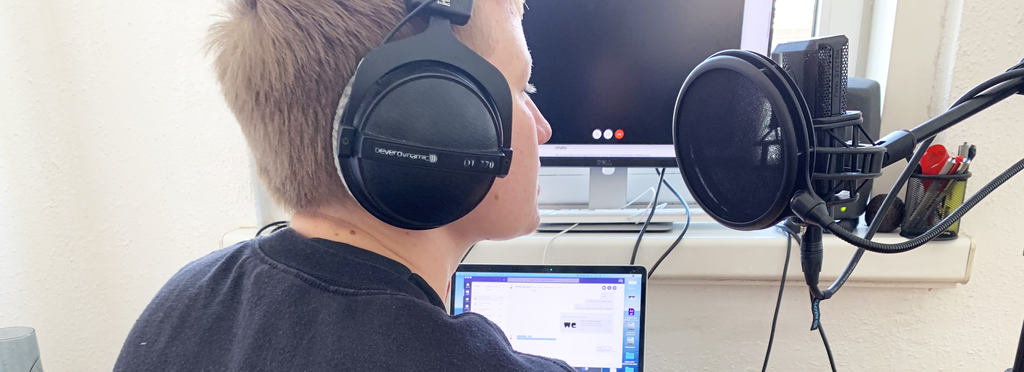
3. Use headphones to monitor your call
Using headphones to monitor your call makes an incredible difference! Not only does it stop feedback but all sorts of other crazy effects such as delays and latencies caused by the playback signal coming from your speakers.
Note that it's extremely important to use a headphone monitoring setup if you want to improve on your call’s overall audio quality.
What happens if you don’t? Well, the results can range from weird delays and playback issues to nasty feedback and complete audio dropouts.
Make sure you have a good internet connection and speed
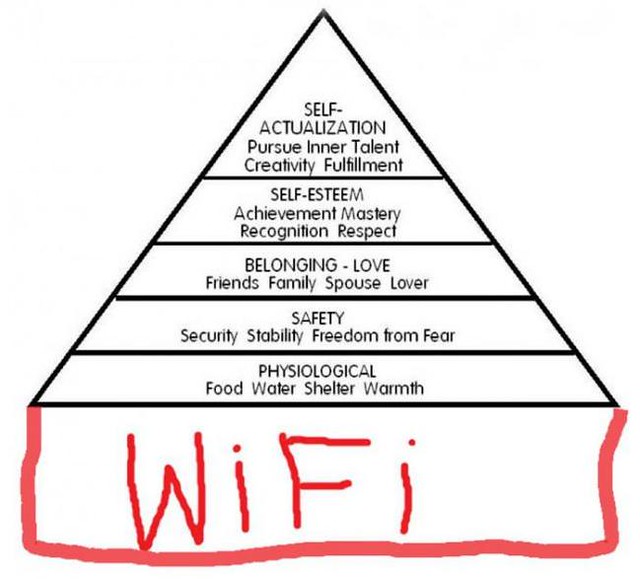
Having had mentioned all of the points above, they still won’t make a difference if your internet connection and speed is poor. That’s why a stable internet connection still is and always will remain the fundamental layer at the bottom of Maslow’s hierarchy of needs ;)
We conducted a few tests to find out what kind of differences may exist between the mic on a Macbook and a more advanced set up of a condenser mic and audio interface.
What we found is that the condenser mic capsule and interface combo delivered a much clearer audio result on both sides of the call. Take a listen to the samples below to hear for yourself. Bear in mind that the audio has been unprocessed other than some level matching between the sources to bring both tracks up to –10dB after the recording.
Notice that Skype actually takes a lot of the high frequencies away which results in a duller sound. That’s why it's imperative to catch the most detail that you possibly can before your signal is processed over the wire.
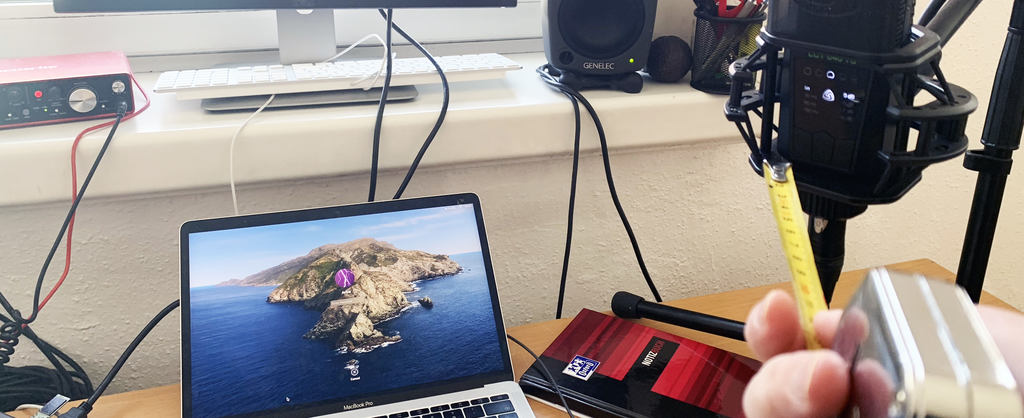
Let’s say that you have an XLR mic at hand as well as an audio interface that you would like to use in your skype interview. You will need the following to complete your pro audio setup:
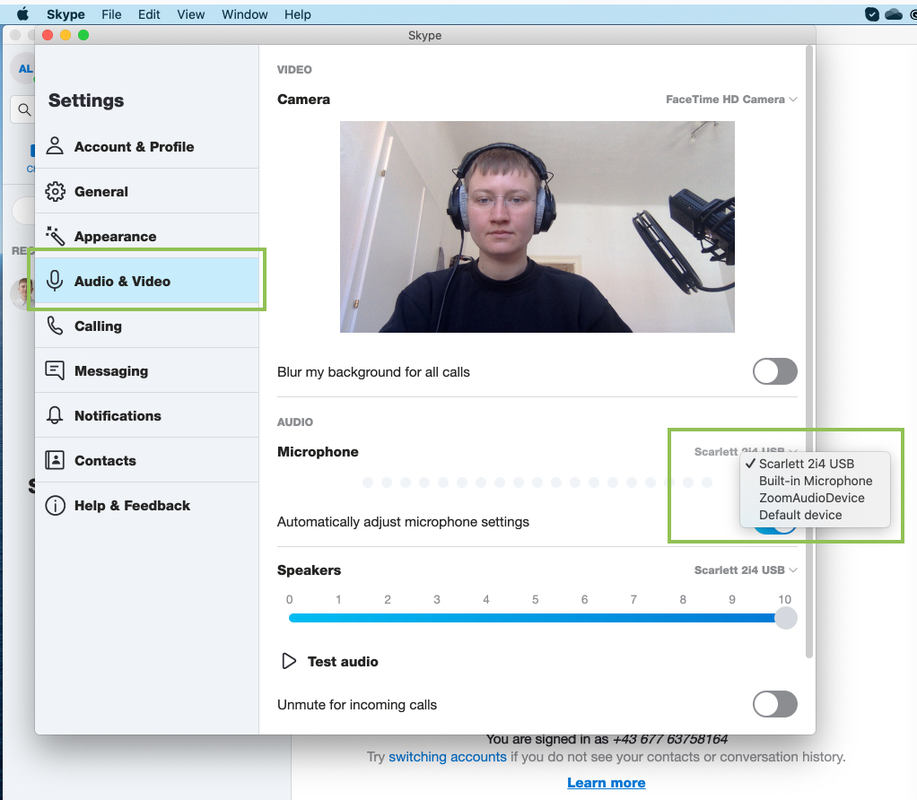
Select which audio interface you may be using via your audio settings in your preferences. Check to make sure that the main monitor level is all the way down and that no audio is coming from your speakers – you will be using the headphone output to monitor your call.
Pay attention to the fact that condenser microphones, such as the LCT 240 PRO, require 48V phantom power from your audio interface. This is a classic point that is regularly overlooked! Don't forget to switch phantom power on!
1. Selecting your audio input via your Skype preferences
A handy tool that skype provides is the 'test call' function which allows you to simulate a call. It's a good feature to test that your setup is functioning correctly.
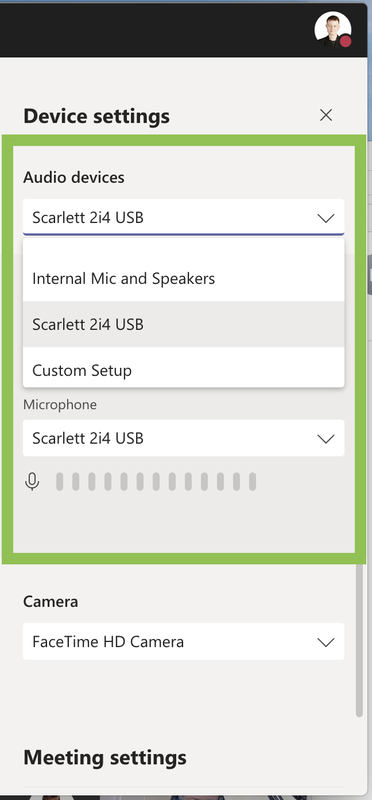
2. Selecting your audio setting in Microsoft Teams
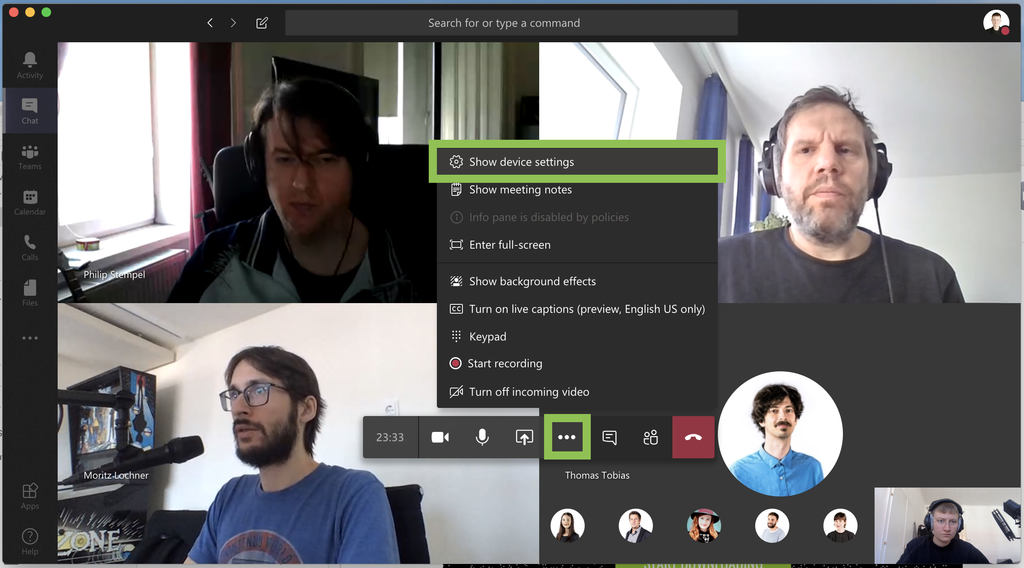
Once you click through, you will see the sidebar with your listed devices – select your audio interface.
3. Discord settings can be found via "Preferences"
Discord audio settings can be accessed via the program's preferences.
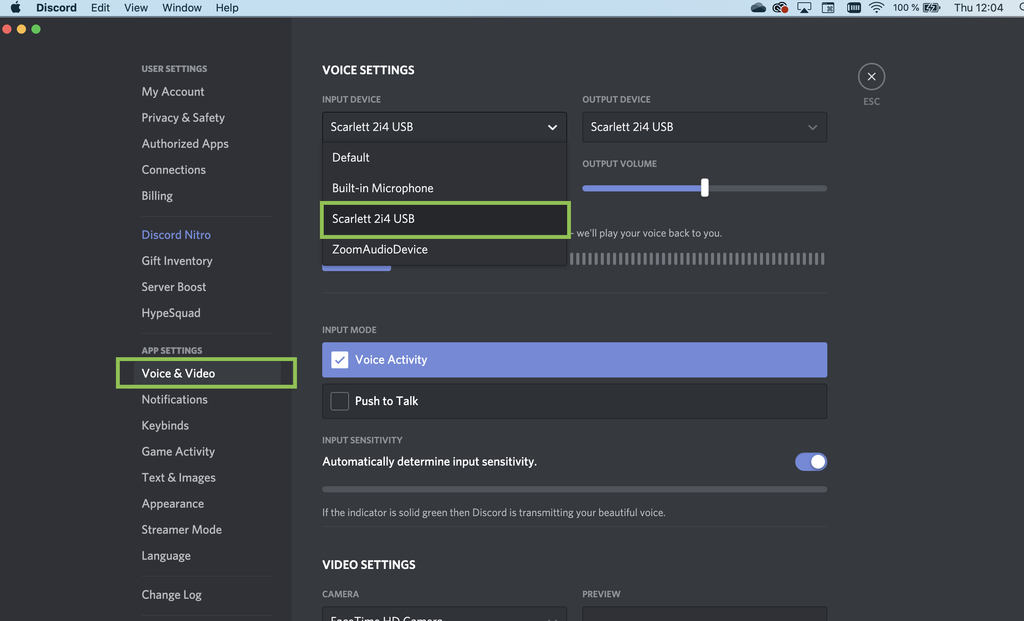
Discord also has advanced audio settings features, they include:
To remain safe, we recommend keeping them all activated.
If you are keen to take your audio quality even further, you can try to integrate other effects such as equalizers and compressors or even reverb via your digital audio workstation by using it as a remote output. This gives you the possibility to really shape and curve your sound beyond what most people probably expect and get really creative!