Blog
Blog
Everyone who starts using an audio interface experiences this – a delay between what you send into your computer and what comes out.
It's called latency, and it occurs for different reasons. This blog will look at all the crucial factors that directly influence your latency performance.
Latency occurs because your signal passes through different analog and digital components, and each takes a particular time to process your signal and therefore introduces a time delay. This delay adds up, resulting in a total delay between audio input (let's say a microphone input signal) and output (speakers). This total value is known as roundtrip latency. 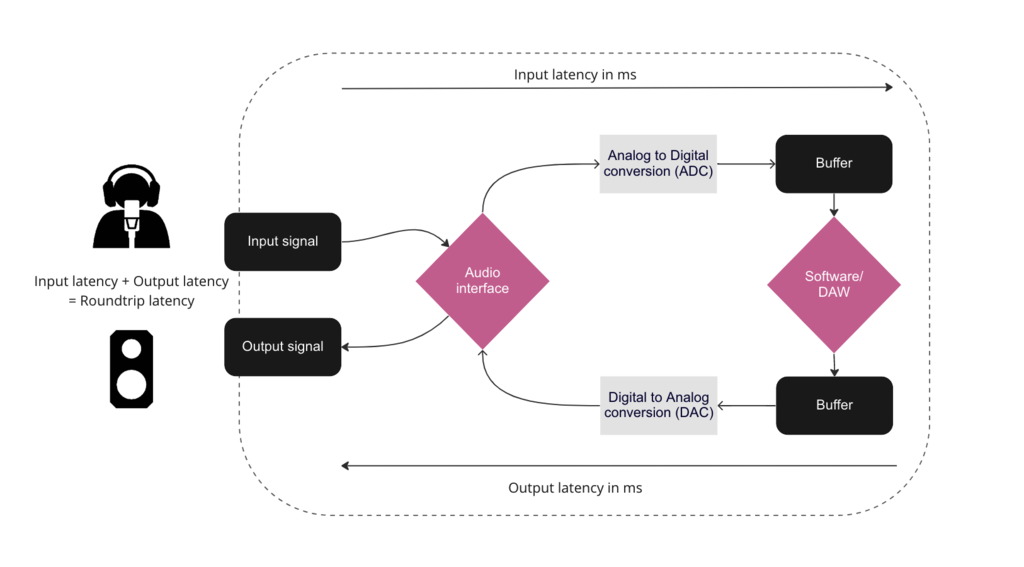
Factors directly influencing your latency performance:
An audio driver manages your audio signals from recording to playback and the communication between your computer and your audio interface. That’s why you need an audio driver to use an audio interface.
A better audio driver leads to better latency performance. The recommendation of your audio interface manufacturer usually yields the best results.
If your audio interface and computer use an efficient audio driver, your latency performance will benefit greatly.
Windows computers often use an ASIO-based driver. Some manufacturers provide dedicated audio interface drivers for Windows that significantly improve your latency performance. Mac computers use the dedicated Core Audio.
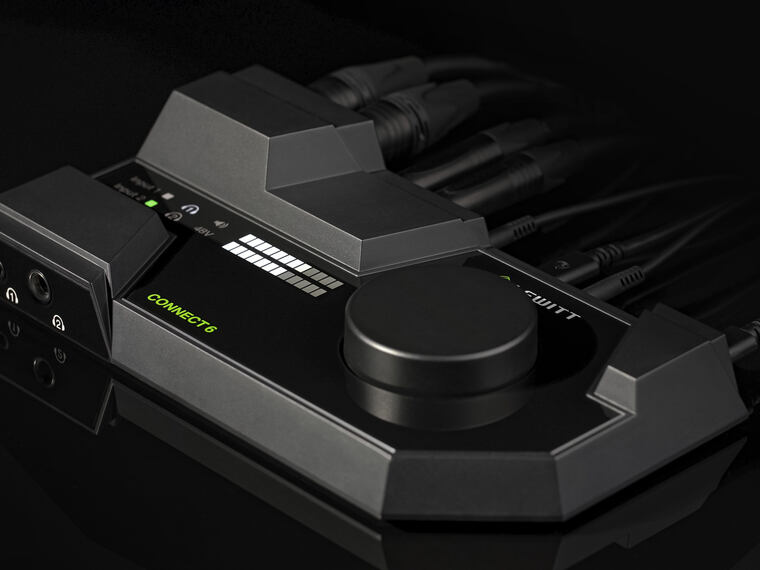
LEWITT low latency audio interfaces
Before we go into too much detail: Unless you process A LOT of input signals simultaneously, a USB 2.0 bus has enough capacities for signal audio processing at low latencies.
Yes, a Thunderbolt connector CAN lead to better latency performance, but that is not due to its higher speed*.
*40 Gbps compared to USB 2.0 with “only” 480 Mbps
Instead, the real reason is how the Thunderbolt technology handles data. Thunderbolt allows connected devices to communicate directly with your computer’s memory, removing usual bottlenecks for fast data transfer.
Long story short: Before you nerd out on different connectors, ensure your audio interface comes with a solid audio driver.
Read more on Thunderbolt here.
Buffer size and CPU power are interconnected, so let’s look at them together.
What is a buffer? A buffer “buys time” for the CPU by delaying the data stream and introducing latency.
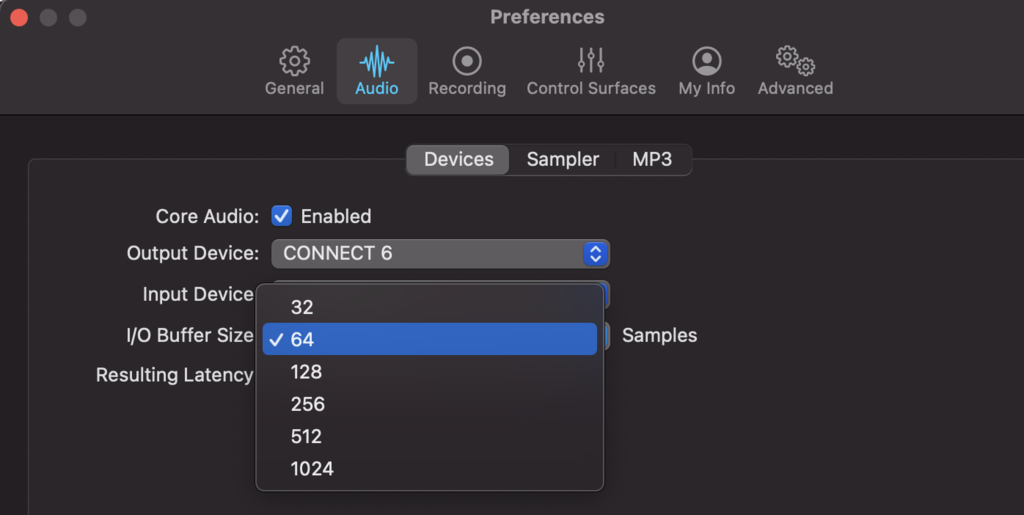
You can set the buffer size in your DAW or audio interface settings.
Low buffer sizes lead to high CPU workload, high buffer sizes to less CPU workload.
When recording, we want to hear what we are doing (close to) in real-time. Imagine playing an instrument, and there is always a gap between what you play and what you hear. You don’t want that.

We need low latencies when recording to avoid hearing a delay between our input and output signals. Most people don't notice latencies below 10 ms or didn't find them disturbing (see paper).
If you keep the roundtrip latency below 10 ms, you should be fine in most recording scenarios.
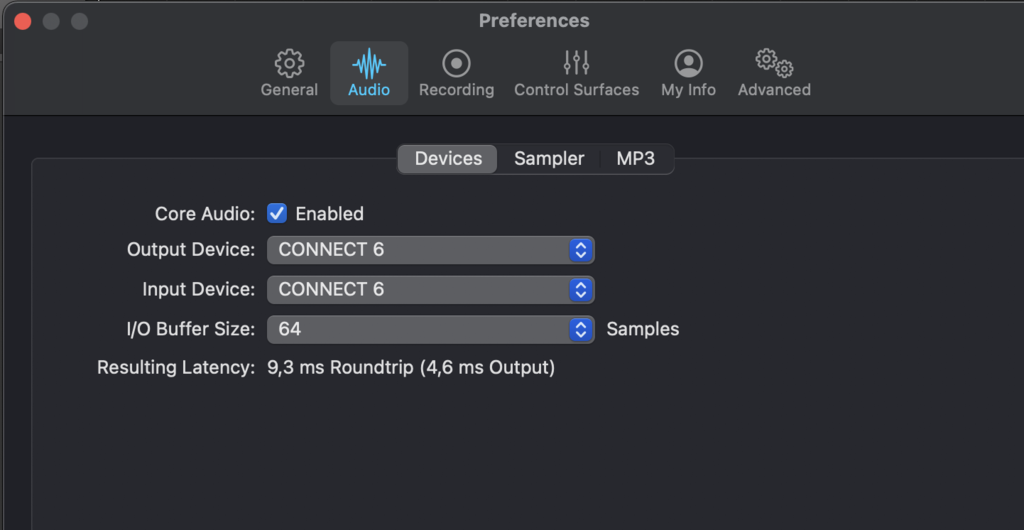
If you have a modern computer, set your buffer size to the lowest value for the lowest latency, and make a recording.
If you encounter dropouts or strange noises, increase the buffer size, and repeat the process.
Please note: The bigger the project gets, the higher the channel count grows, the more plugins or virtual instruments you use, the more CPU power will be occupied. That’s also why we use a different approach for the mixing process.

Most audio interfaces come with a direct monitoring function that allows you to send your input signal straight to your headphone output before all the digital processing delays your signal.
If activated, you can hear your playback (with only the output latency) plus your input signal simultaneously.
The upside of direct monitoring is close to zero latency. The downside is that you'll hear a only dry input signal.
This can be odd when you're recording guitars going straight to the audio interface or when you are used to recording vocals with some reverb or compression on top.
But for recording drums, I find direct monitoring a handy feature. Why? Because drums have a comparably high attack and, therefore very sensitive to high latency times.
We will usually start to mix after we record our tracks. At the mixing stage, we want to introduce more plugins for effects, eq, compression, etc., but we don't need "real-time" monitoring.
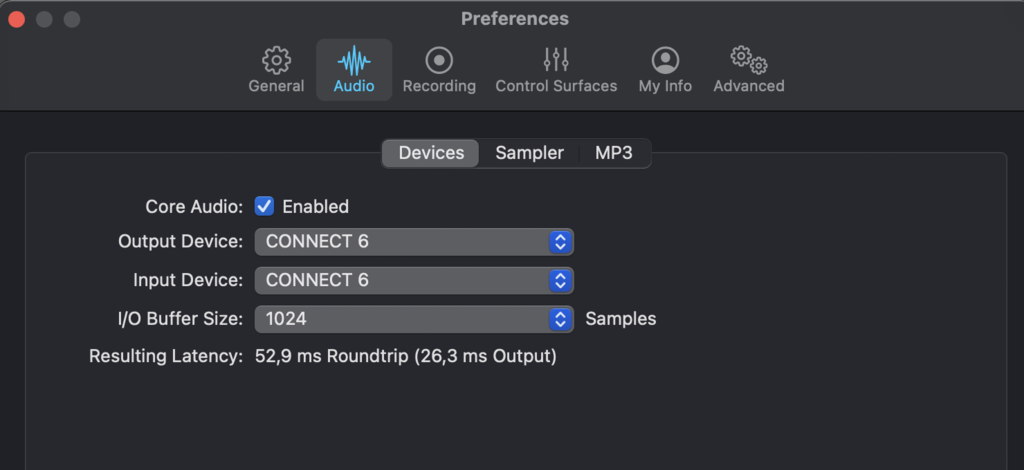
Whatever we do in this regard will use CPU power, and with a few reverbs and delays on our tracks, we might encounter dropouts when playing back our recording session. In this case, our buffer size is too small, and our CPU can't keep up.
Since we don’t need to perform or hear something in “real-time” when mixing, we can simply increase the buffer size for optimal performance.
Performance improvement tips
If your resources are still too low, there are ways to free up your CPU performance for mixing (and recording).
Since buffers are measured in samples, and the sample rate is measured in frequency (how many samples per second are taken), you can calculate latency, measured in ms (milliseconds) from the two values.
Buffer size / sample rate = latency
Let's try it.
A sample rate of 48 kHz is ideal for music recording and podcasts. Let's aim for low latency in these scenarios and choose a small buffer of 64 samples. Since Hz = 1/s and we want to have our latency in ms, the calculation is quite simple.
64 / 48 = 1,3 (latency in ms) -> Why is it so low?
1. This calculation considers only one buffering stage.
2. Other components in the processing path might additionally introduce latency.
3. You can see that a higher sample rate will result in lower latencies.
Higher sample rates create bigger file sizes and are therefore heavier on your system, especially the RAM of your computer, while recording and playback.
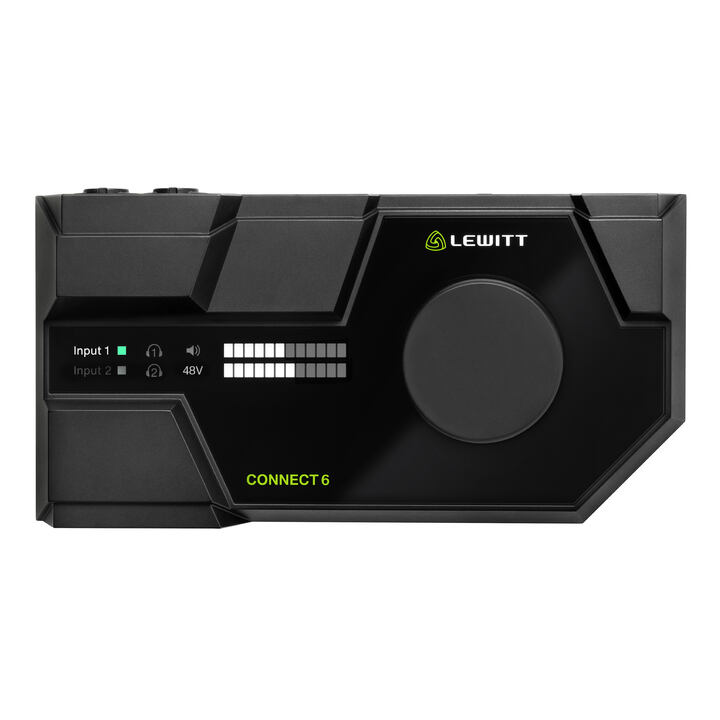
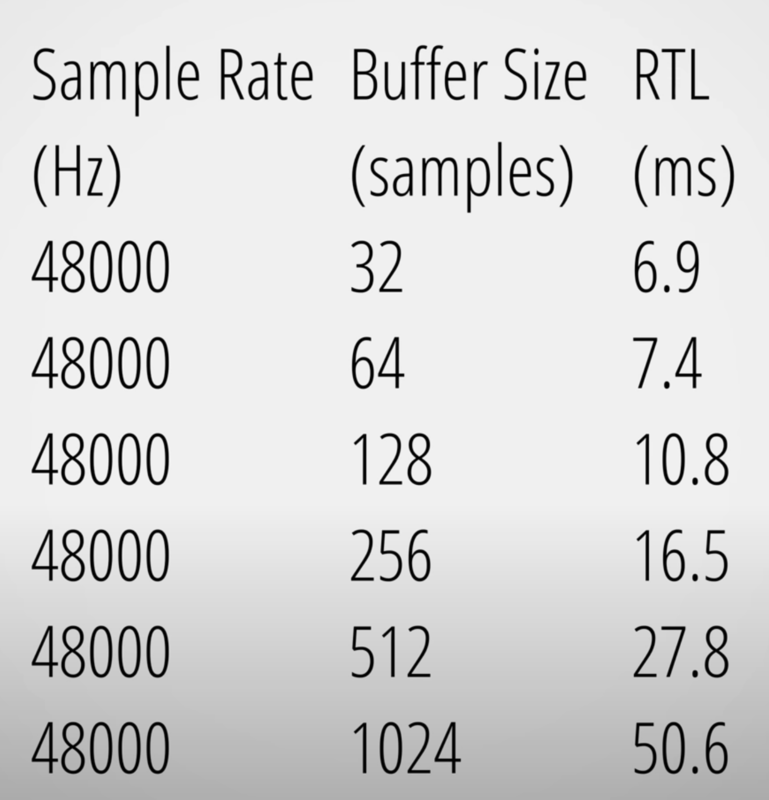
Here are some measurements of our CONNECT 6 audio interface done by Julian Krause. If you are looking for a new audio interface, definitely check out his YouTube channel before you do.
As mentioned before, you want to aim for short latency times when recording and don't need to care about latency in post-production.
When you aim for optimal latency, consider this list
We hope this article was helpful. If you have any further technical questions, send us a message. We'll be glad to help.
Related stories
Why CONNECT 6 is a great audio interface for home recording
CONNECT 6 is built from the ground up to be useful in any recording situation, whether you’re streaming, playing live, or just laying down tracks. In this…
What is XLR?
You can find XLR cables and connectors on many professional audio devices, including all types of microphones for recording and stage use. When someone asks…

How does a microphone work?
In this blog, you’ll find out how a microphone works. We’ll talk about the two main types of microphones for recording, dynamic and condenser microphones. And…

What is DSP?
If you have been around the audio world long enough, you have heard the term DSP or DSP-powered. But what does this mean? In this blog, we will look at what DSP…