Blog
Blog
If you have been around the audio world long enough, you have heard the term DSP or DSP-powered. But what does this mean?
In this blog, we will look at what DSP stands for and how it helps audio interfaces become even more valuable.
DSP stands for "Digital Signal Processing".
A signal processor is any device that alters or modifies an audio signal from its input to its output.
Analog signal processing uses physical components like resistors, capacitors, and amplifiers to modify signals in real-time (as continuous values).
Digital signal processing uses algorithms to process and modify digitally converted signals (discrete values).
DSP is used in devices like headphones for noise cancelling, studio monitors to equalize, mixing consoles, and audio interfaces.
In this blog, we will focus on DSP in audio interfaces.
So, why would you want DSP in your audio interface?
Let’s have a look at how DSP can improve your workflow.
1. Save CPU power
If you add a plugin to your DAW, your computer's CPU handles the workload. And if you add a lot of plugins, your CPU may start to struggle.
DSP can save precious CPU power, so your session can run smoothly and without stutter.
With a DSP-powered audio interface, you can use the effects of the audio interface and its DSP to take over some of those effects instead.
2. Zero latency while monitoring
When you record vocals or instruments, you want the signal you hear on your headphones while recording without or only minimal latency.
Nothing is worse than recording with a noticeable delay in your monitoring.
Latency is the time it takes for an audio signal to travel from your input source to your speakers. If you run an effect on your computer, the signal travels from your interface into your DAW, gets processed there, and then back again to your audio interface and your headphones or studio monitors.
With a DSP-powered interface, the signal doesn’t have to travel to the DAW; it gets processed on the interface and has near-zero latency because of that - which is a big upside while recording.
3. Setups without a computer
Some audio interfaces can be used stand-alone and without a computer.
Without a computer, you rely on a DSP-powered audio interface for effects and other signal processing.
LEWITT audio interfaces with DSP power
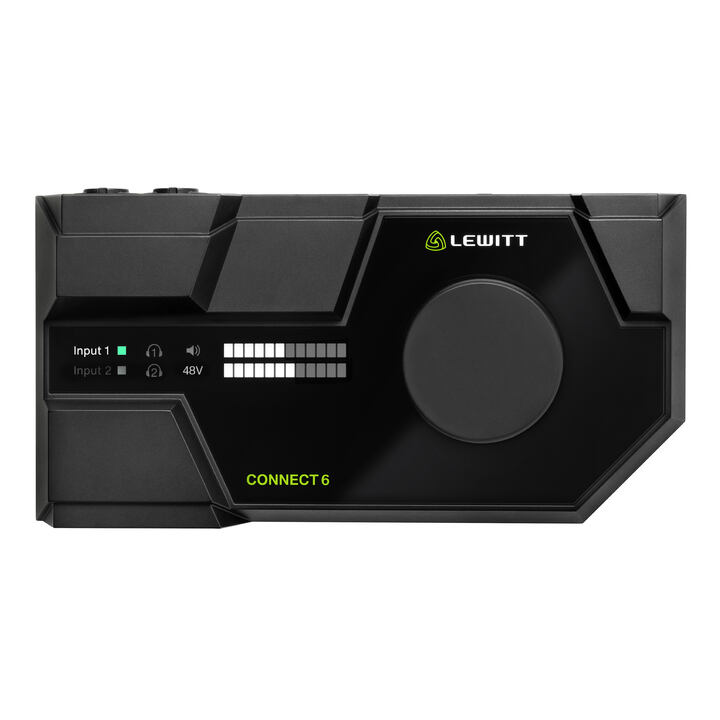
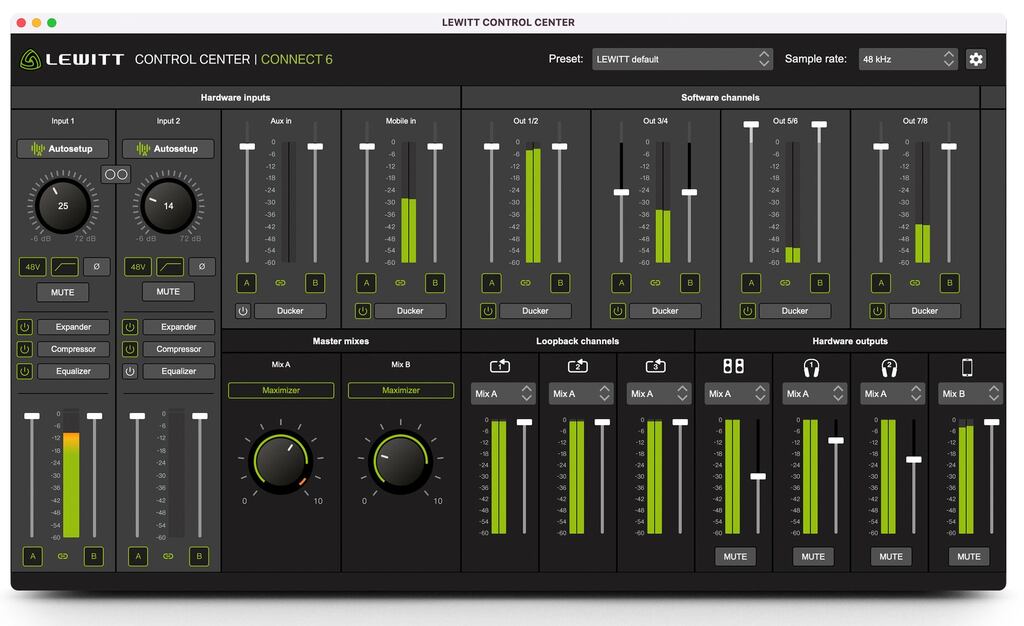
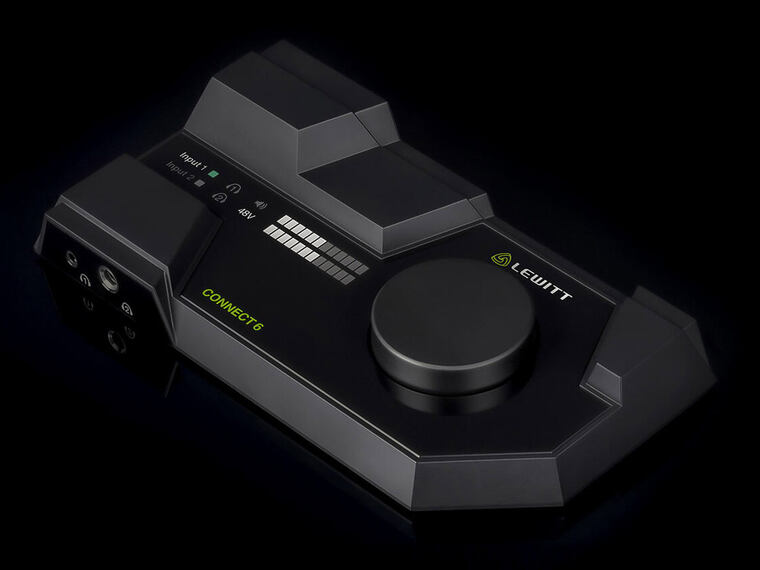
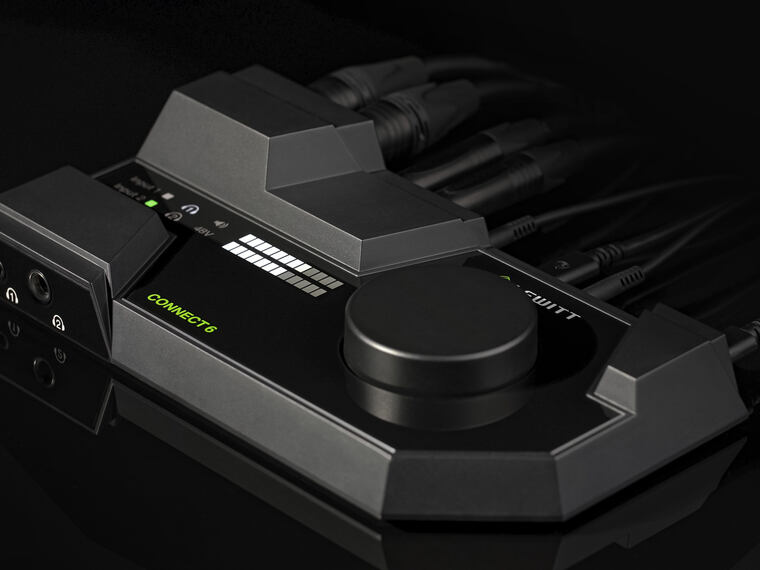
CONNECT 6 is an audio interface with game-changing flexibility.
It's a versatile interface, excellent for recording, podcasting, streaming, or content creation.
Here’s an overview of its DSP-powered features:
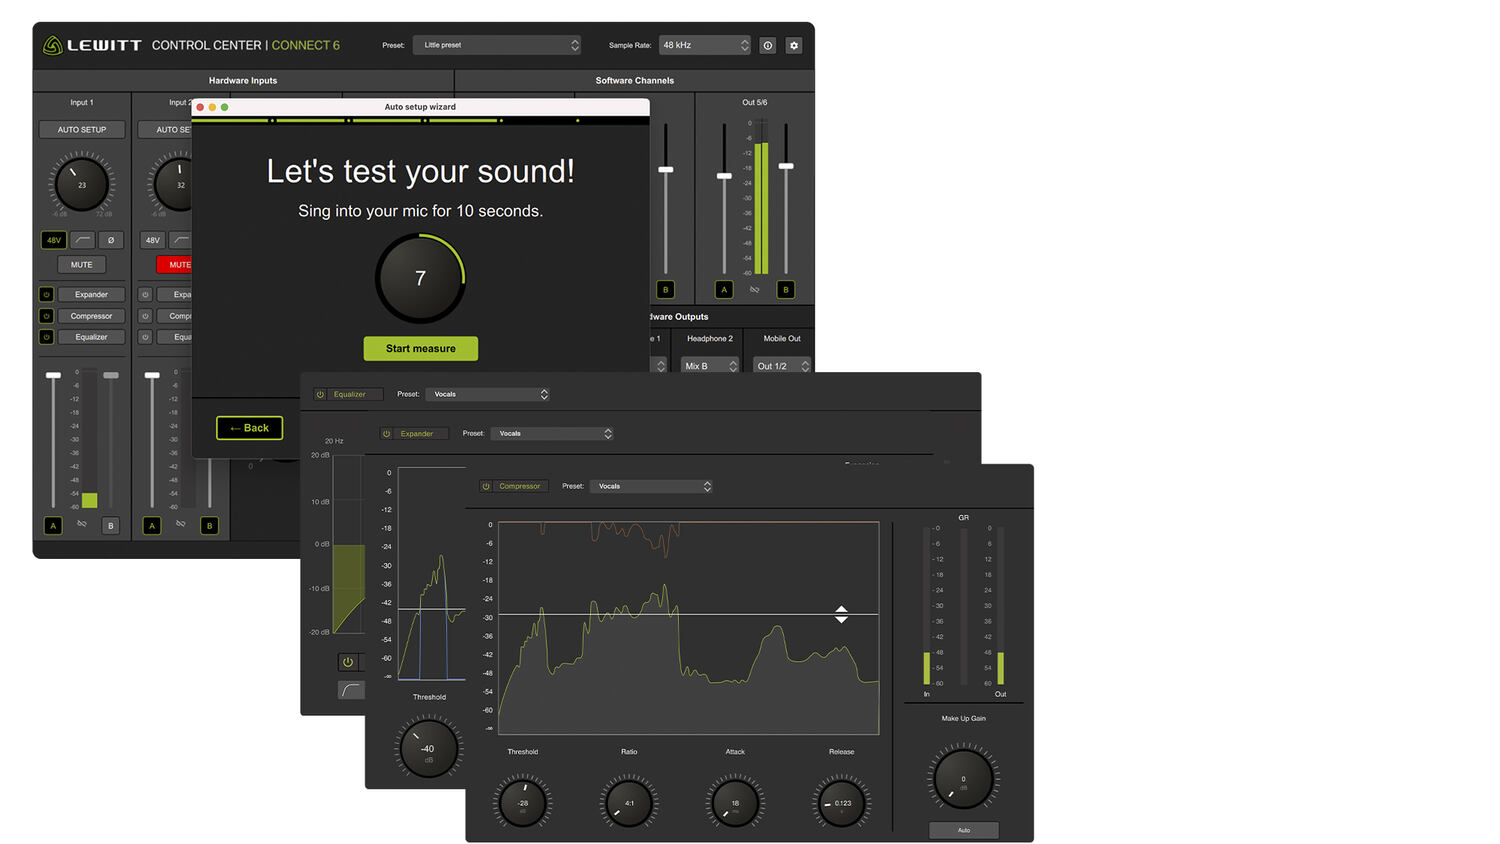
Autosetup
CONNECT 6 enables you to run Autosetup.
It’s a short, guided process that asks you a few questions and sets up your audio interface exactly for what you are trying to do. I
Autosetup finds the perfect settings, applies effects, and makes sure you sound great.
Equalizer
CONNECT 6 offers a flexible 4-band equalizer that includes shelves, bells, notches, and low/high cut filters so you can clean up and shape your audio.
Equalization is the process of boosting or cutting specific frequencies to alter the tonal balance of a source.
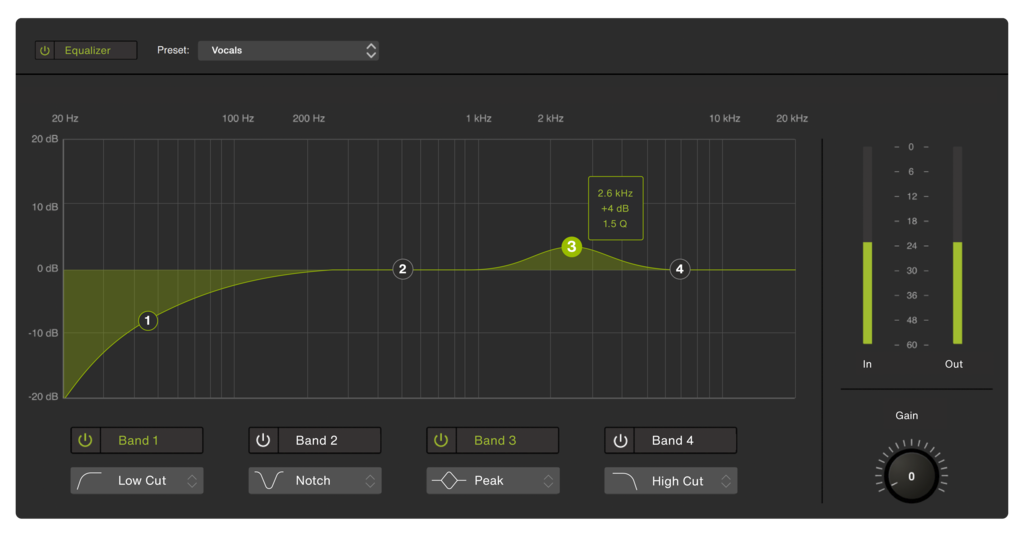
How you can use the CONNECT 6 equalizer during tracking:
Compressor
A compressor reduces the dynamics of your signal to make your voice or instrument sound more uniform.
The lower-level parts get louder, and the louder parts get quieter.
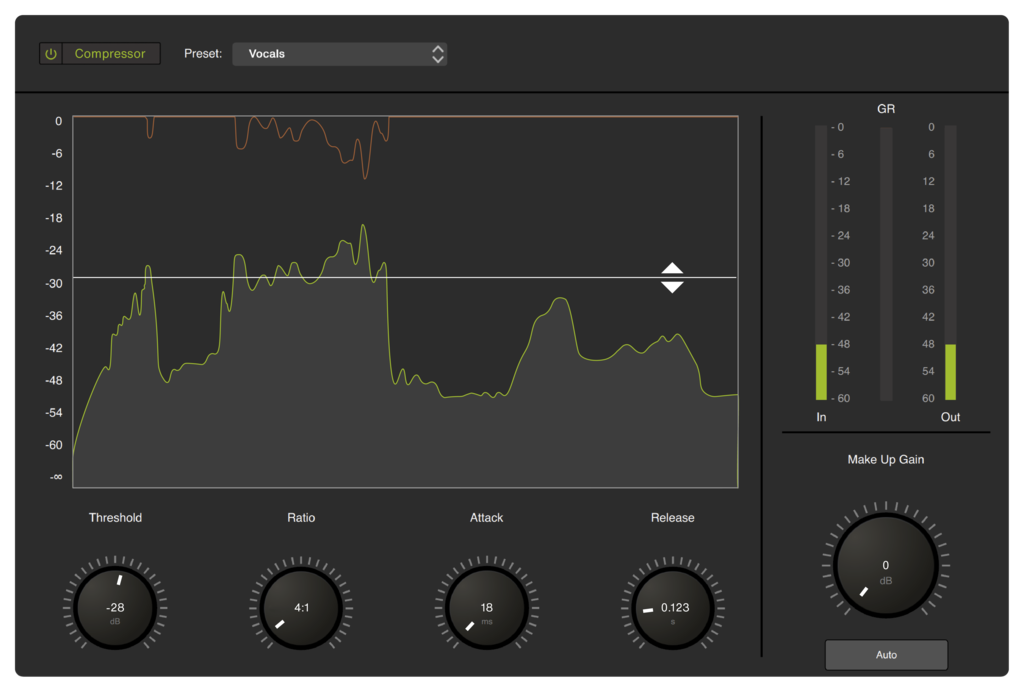
Here are some examples of common uses for a compressor:
Maximizer
While a limiter prevents peaks from exceeding a certain threshold, a maximizer increases the overall loudness and then sets a ceiling to prevent clipping.
A maximizer increases the overall loudness and sets a ceiling to prevent clipping.
In CONTROL CENTER of CONNECT 6, you have two different mix buses, each with a maximizer. A maximizer allows you to increase the overall loudness of the mix without worrying about distortion from clipping.
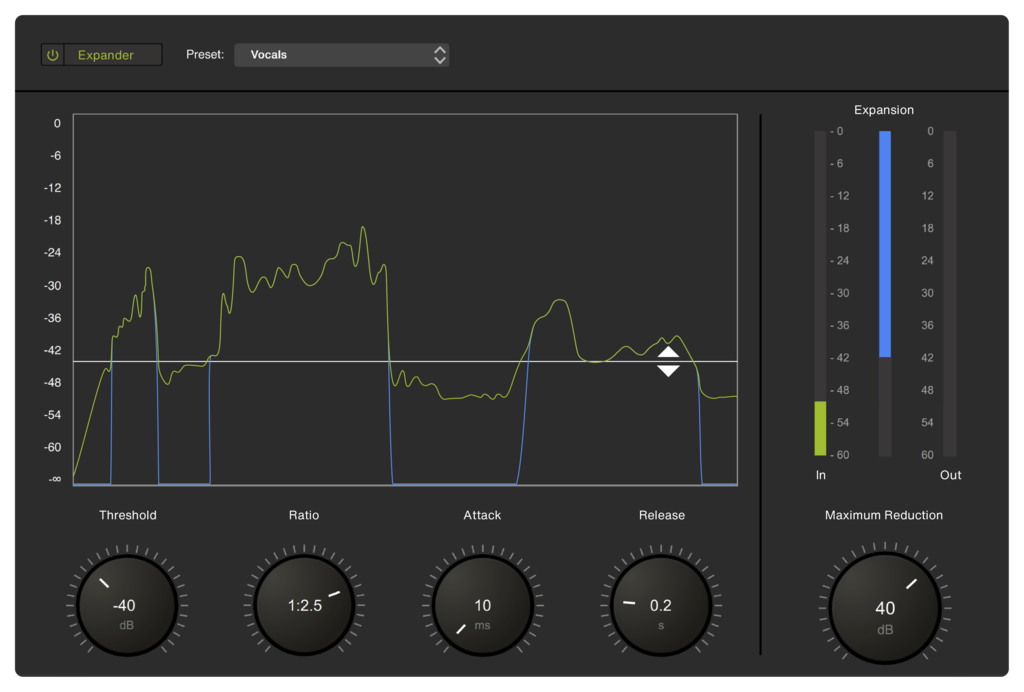
Expander
The expander might become your best friend if you have a noisy recording environment. These tools can be used as gates that can remove a variety of low-level noises, such as:
Advanced signal routing
CONNECT 6 offers advanced routing options to send anything anywhere via the CONTROL CENTER. You can create two completely independent audio mixes by combining hardware and software audio sources.
CONNECT 2 is the most user-friendly audio interface on the market. It offers single-click DSP-powered effects that make you sound your best.
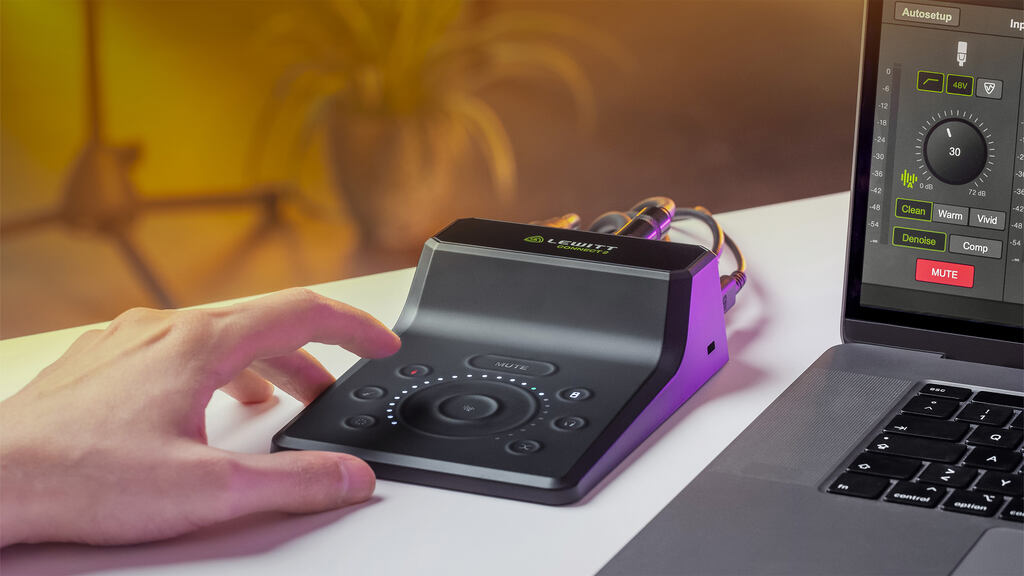
Let’s have a look at its features and how the DSP will make your recording journey a walk in the park.
Autosetup
Autosetup is a short, guided process that you can activate to let CONNECT 2 find the perfect settings for your recording session. You don’t need to be an audio pro to set up your audio interface.
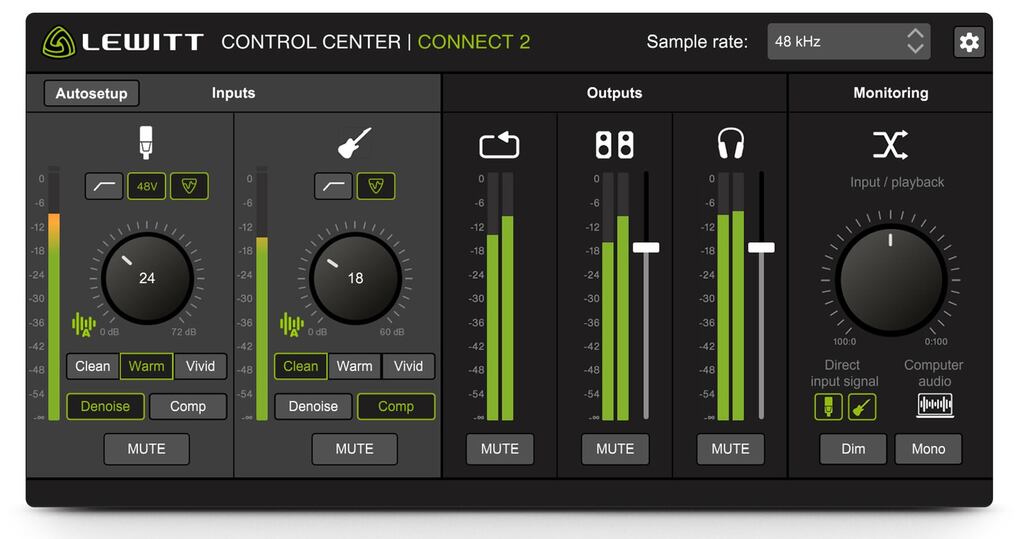
Clipguard
Clipguard is a safety measure that makes it impossible for your signal to clip. You can be sure that a sudden increase in volume will not ruin your recording. This is achieved by a DSP-powered process that adds an additional 20 dB of headroom to your recording.
Denoiser
Denoiser uses DSP-powered audio expansion for a clearer signal. It removes background noise and humming while retaining natural sound, making it ideal for easy communication or recording.
Compressor
Activate the compressor for professional sound quality and a uniform sound image. With CONNECT 2, a single click is enough to get a polished sound, just like your favorite record.
CONNECT 2 also offers 3 different preamp sounds to switch up the vibe of your recording.
We hope you find all the info you needed, if you have more questions regarding DSP or our microphones and audio interfaces in particular, feel free to contact us.
Related stories

How to get low latency for your audio interface
Everyone who starts using an audio interface experiences this – a delay between what you send into your computer and what comes out. It's called latency, and it…

How to record computer audio via loopback
Have you ever needed to record the audio from an application on your computer, like a music player or game? If you have already tried, you might have found out…
How to make a podcast with CONNECT 6
With tons of input options and routing possibilities, the CONNECT 6 is the perfect tool to record a podcast. In this blog article, we’ll look at 4 different…
Why CONNECT 6 is a great audio interface for home recording
CONNECT 6 is built from the ground up to be useful in any recording situation, whether you’re streaming, playing live, or just laying down tracks. In this…