Blog
Blog
Getting your guitars to sit right in the mix can be tricky. But it doesn't take much to get your guitars where you want.
This blog will show you 5 easy tricks to make your guitars sound spectacular!
We'll talk about the following topics:
If you prefer to watch and listen, check out the video below! All tracks in the video were recorded with the MTP 440 DM dynamic microphone.
An essential first step of any mix is to get a rough balance of all the instruments first.
You want to establish the relationship between instruments before you dive into processing individual elements because it can change how you hear the tonality of each track.
Make sure you have a rough mix you are happy with before applying the next steps.
After you find the appropriate level of the guitar in context, you might find that your guitar still lacks something. This is the time to make some broad adjustments with a character EQ.
I like to use analog-style EQ plugins because they are less reliant on visual graphs and have broader EQ curves.
This lets you make bigger-picture changes to the sound and focus less on what you see and more on what you hear.
Always trust your ears more than your eyes.
There are a few different zones to pay attention to for presence on your guitar.
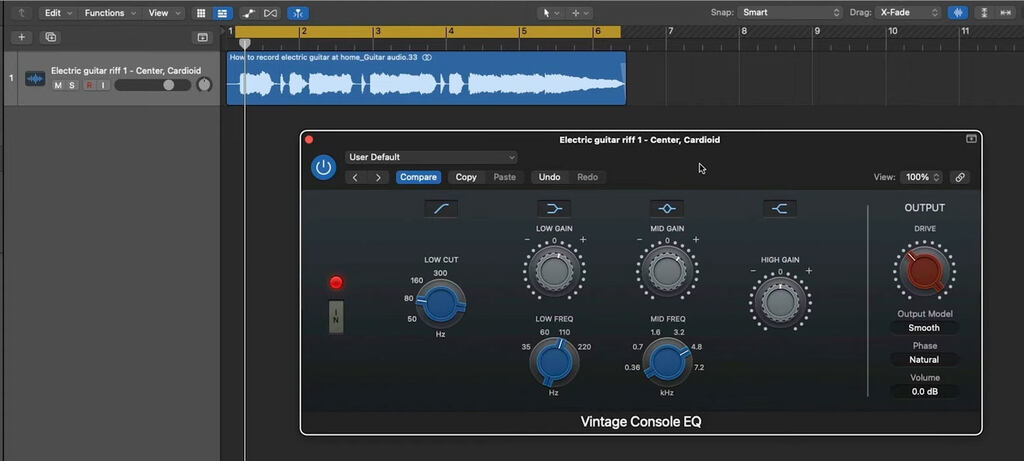
If your guitar sounds too thin and lacks power, adjusting the lower end of the spectrum is your best bet.
If your guitar sounds thin and scooped, you should bring back more of that crucial midrange area around 500 Hz.
After this step, reassess your guitar level in the mix because these tonal changes can easily throw off the balance and make it sound too loud or quiet.
Now, let's listen to the before and after.
The first step of cleanup is usually to cut excess lows and highs with filters.
I usually apply a low-cut filter around 80 Hz or 100 Hz. Of course, this depends on the song, guitar, vibe, etc.
Your best bet is to raise the low cut until it's taking too much away from the guitar and then bring it back until you're happy with it.
With the cleanup EQ, you don't want to cut into the guitar's tone.
I don't always cut the high end, but occasionally, you get some harshness and tinny-sounding distortion. In that case, a low pass at around 8-10 kHz can be beneficial.
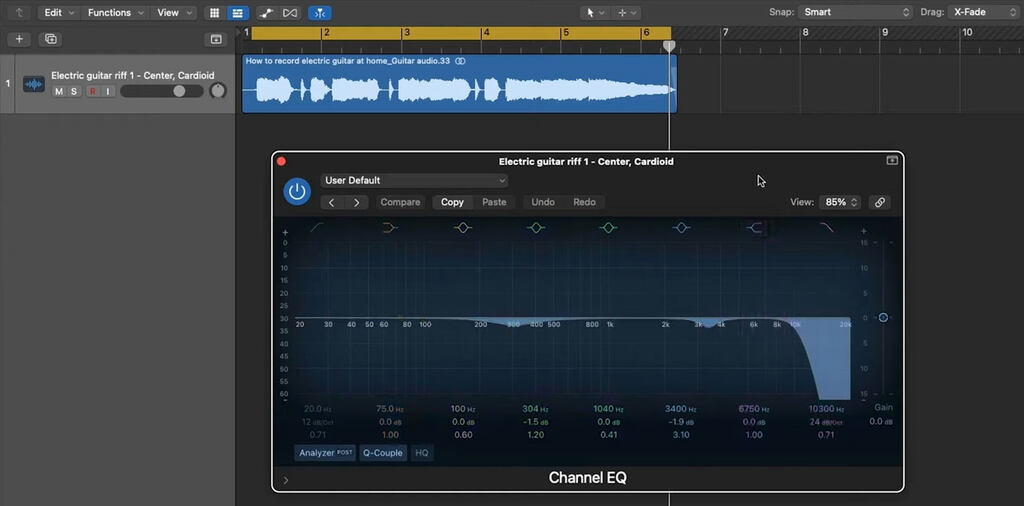
Another common area that needs a clean-up is the upper mids.
If your guitar sounds harsh, try a narrow bell cut between 2 kHz and 4 kHz.
This is the area where guitars can stab you in the ears. A little notch here can do wonders to make your guitar sound smoother and fuller.
Often, If I'm struggling to get my guitar present in the mix without it sounding painful, this cut will do the trick.
I'll also sometimes address the low mids if there is too much buildup with the bass guitar, and if it sounds murky. Tread carefully here because the low mids are essential to the guitar sounding powerful. But a slight cut around 250-350 Hz can ease the congestion.
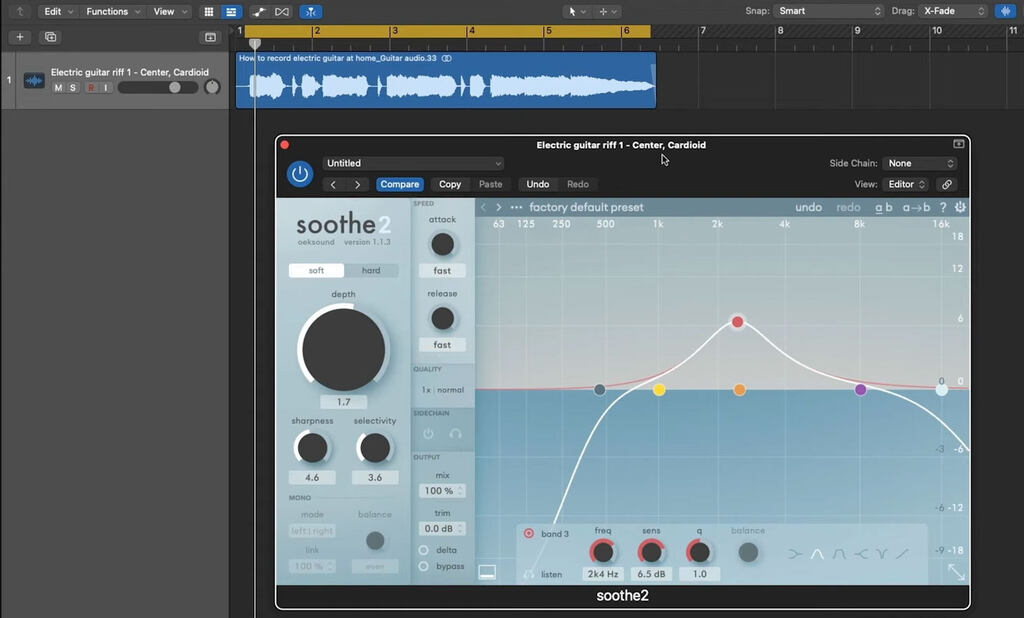
A plugin that can work wonders here is Soothe 2. It can address harshness and frequency buildups dynamically, so you keep your tone intact.
Let's listen to the before and after.
There are two different ways I use compression on electric guitars.
To control transient peaks or to add snap and excitement.
Let's talk about controlling peaks:
The cleaner your guitar tone, the more dynamic it will be, so it will likely need more compression. I'll often grab an 1176-style compressor and dial in a fast attack and release to grab the highest peaks. This will give you relatively transparent dynamic control.
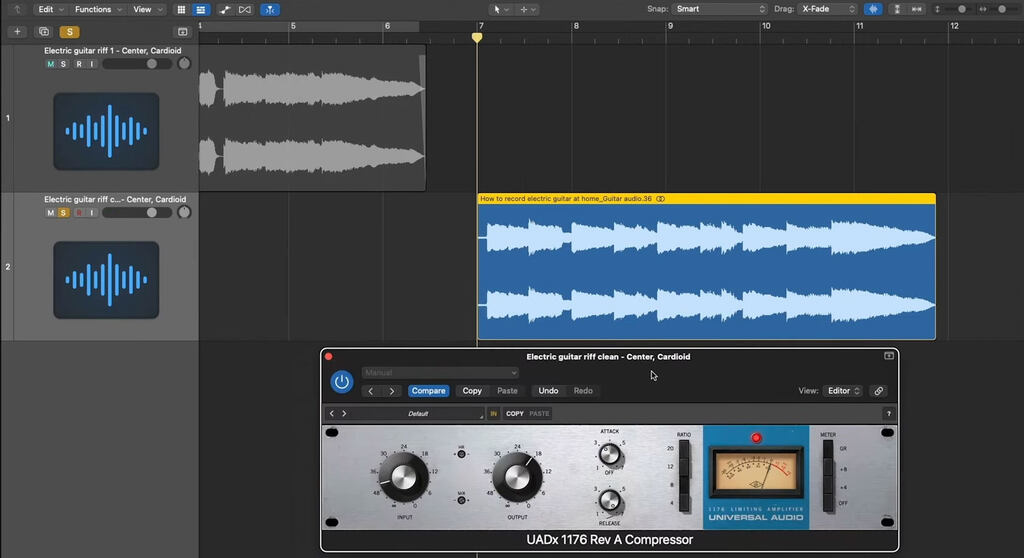
I'll use a slower attack, lower ratio, and fast release to add snap and excitement.
Let's use an 1176 again: set the attack to slowest and release to fastest. 4:1 ratio and 3-6 dB of gain reduction.
This gives you a more apparent compressed sound but can add some great energy to a guitar track. Slow the release to push the guitar further back in the mix.
Bring down the mix to reduce the effect and make it more subtle by blending in the dry signal.
Let's listen to the before and after.
Sometimes, a recorded guitar track can still sound a bit lackluster or dull, even after EQ and compression. Adding some extra saturation can bring it back to life.
Let's bring up Decapitator and add some excitement.
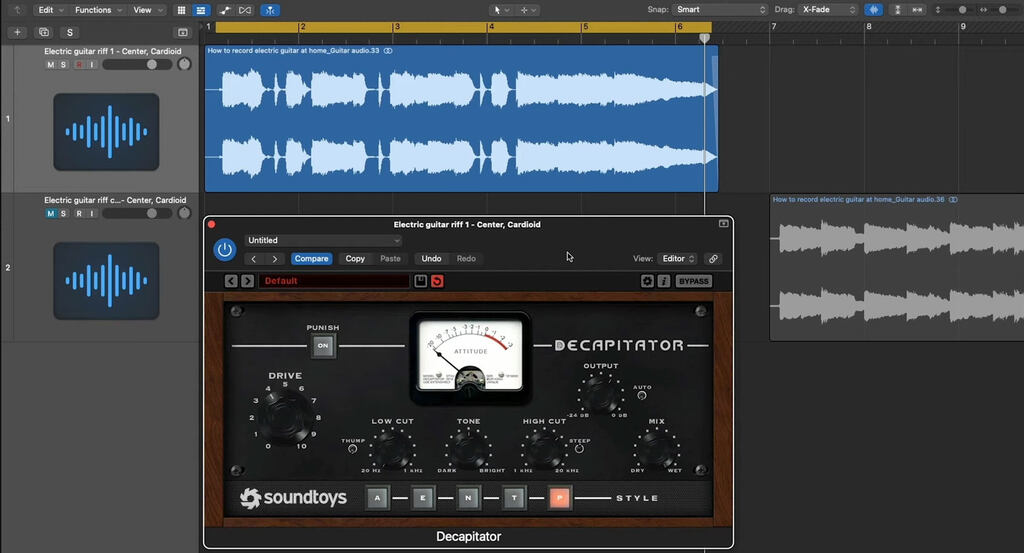
Experiment with types of saturation. Here, I like the pentode mode. I'll bring it up to taste and then usually use the filter to cut out some of the harsh upper harmonics that get generated.
Sometimes, only a tiny bit is needed to enhance the energy. Other times, it can transform your guitar tone (if that's what you want).
Once again, let's listen to the before and after.
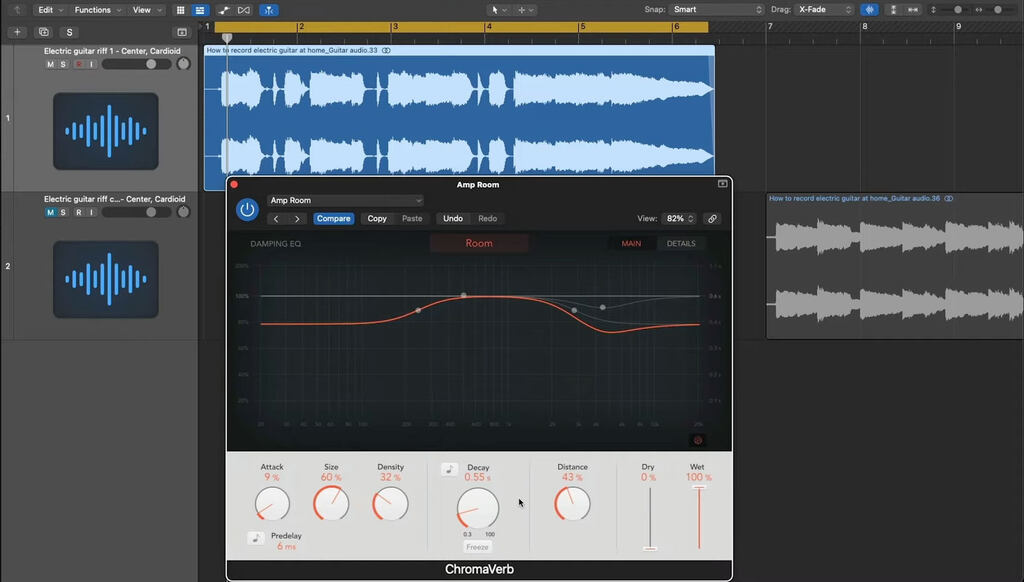
Lastly, I like to add some ambiance to guitars to give them a sense of width and depth.
I'll use a room emulation with a super short decay (about half a second) just to give it a sense of space and width. The goal is to add a sense of realism rather than using reverb as an audible effect.
It can also help push the guitars further back into the mix. To keep the guitars clear and upfront, use a bit of pre-delay (about 5-15 ms) and a low cut filter at around 200-250 Hz to avoid frequency masking.
Alternatively, you can use a short slap-back delay to give a sense of space around the guitar. The goal is not to use it as an additional effect but to make it feel more realistic and blend with the track.
Slap-back can be a helpful and effective way to add ambiance, especially if you want your guitar very upfront. So dial in just enough to add a subtle sense of width and always listen in context.
Let's listen to the before and after.
Related stories
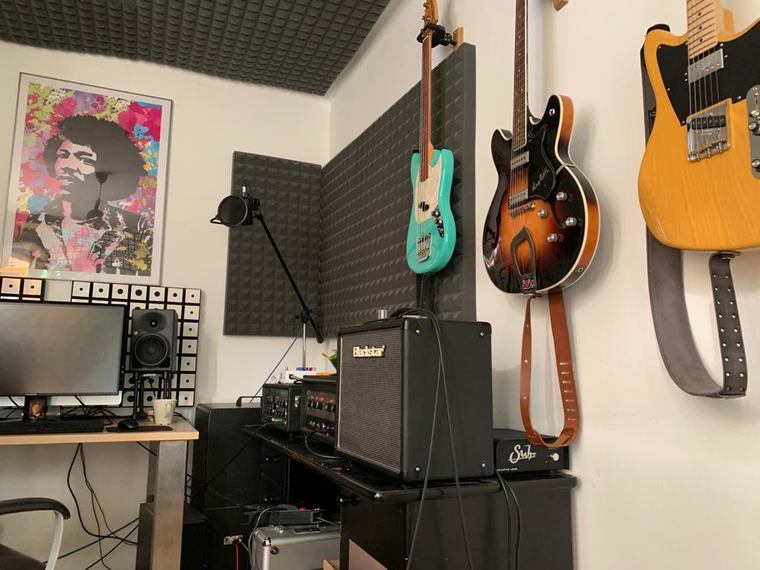
How to record your electric guitar at home
It’s time to take your guitar playing to the next level and record your music. We’re here to help.

How to mix acoustic guitar
So you found the perfect microphone and captured a great acoustic guitar recording. Now it’s time to do some additional processing to bring out the best in your…
![[Photo © Ola Englund]](https://d2pucgucjvdva3.cloudfront.net/sites/default/files/styles/t43_s/public/2018-09/olaenglundphoto.jpg)
Heavy guitar mic shoot out with Ola Englund
Ola Englund, Swedish guitarist, producer, and YouTuber tries out different LEWITT mics. Check out the solid 6/10 video.
How to improve your mixes with 7 steps
Your mix is finally coming together; all the parts sound just right after all those hours you put in. Who needs a break when you are having this much fun? A…