
Blog
Blog
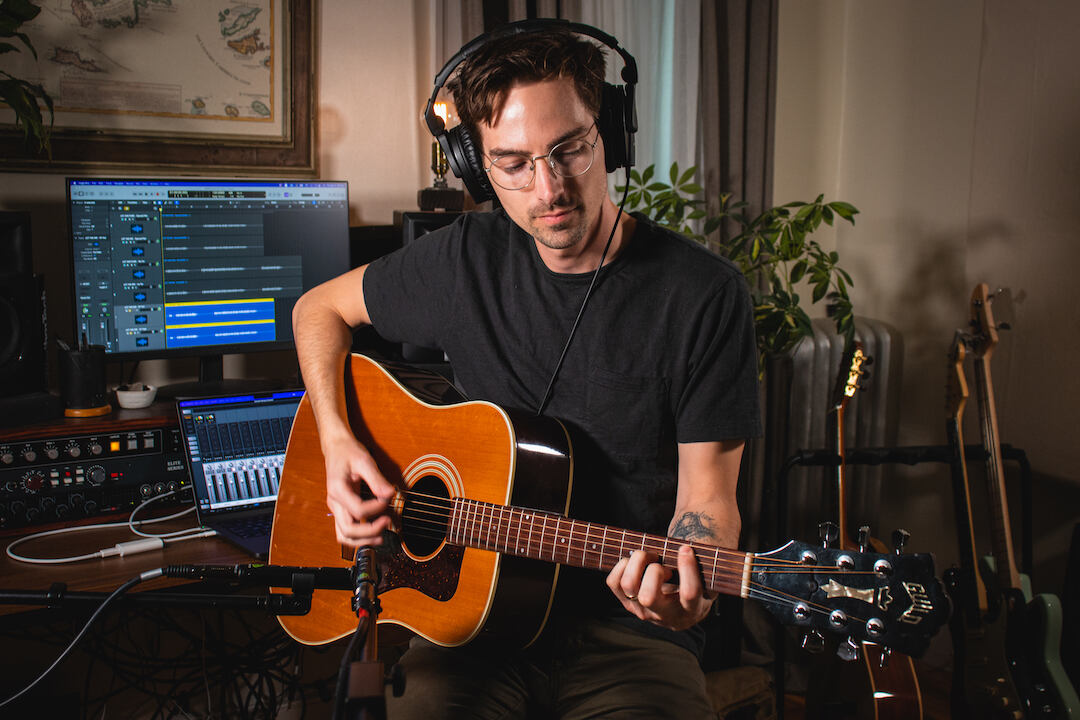
In this blog, I’m going to be talking about recording acoustic guitar and how to overcome the challenges of working in a home studio. We’ll talk about bad room acoustics, environmental noise as well as microphone choices, placement and recording levels and I’ll also share one of my favorite mic techniques.
Also, check out this video about how to record acoustic guitar at home.
One of the main issues you’ll have to contend with in most home studios is environmental noise (ex. Air conditioners, laundry machines, neighbors making noise). The best way to mitigate this problem is to choose the time of day wisely, paying attention to when these environmental noises are most likely. If you can learn your neighbor's laundry schedule—you can work around it!
Additionally, you’ll want to choose the room you record in wisely. If you are able, choose a room further from the front door and living room—places that will likely be sources of noise.
For more ways to manage environmental noise, check out how to improve your audio recordings at home.
To get a good acoustic guitar sound, you should avoid recording in rooms with a lot of reflections or reverb because they can mask the detail of the instrument or create unpleasant resonant frequencies. It's easy to add reverb but almost impossible to remove it. Pick a room with rugs and soft furniture that will help absorb reverberation. In a pinch, you can also put up some heavy blankets on mic stands or chairs as a DIY baffle. It doesn’t need to be an anechoic chamber, but you want to dampen any obvious reflections.
You can also try out our tips for acoustic treatment for recording.
Let's have a listen
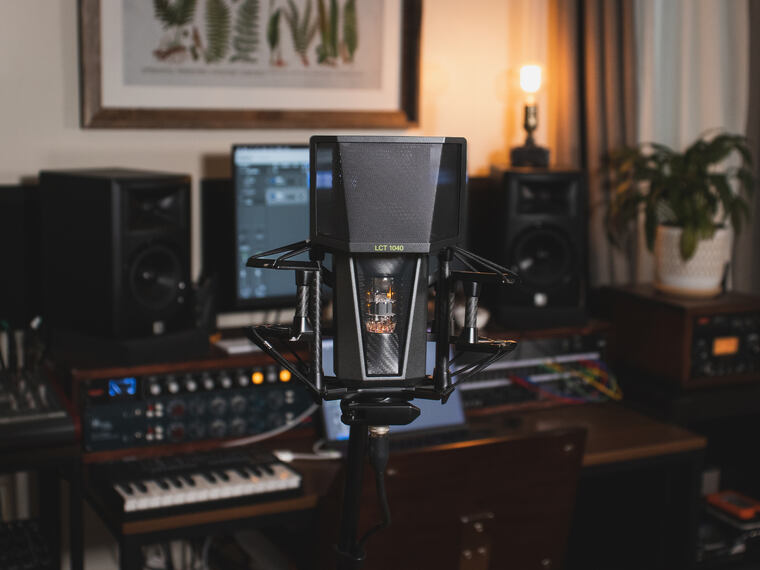
Below, you can listen to 2 acoustic guitar recordings. One was recorded in a kitchen with bad room acoustics, and one in my home studio with acoustic treatment. I used the LCT 440 PURE microphone.
My top two choices for recording acoustic are typically a small diaphragm condenser like the LCT 140 AIR of a large diaphragm condenser like the LCT 440 PURE. Both will give you a natural, open sound, but they have different characteristics. Small diagrams are known for their fast transient response and accurate frequency balance. Large diagrams are known to capture more fullness and warmth while still capturing smooth high frequency detail.
I also would recommend in most situations to use a cardioid polar pattern, which is the default pattern of these two mic options. This pattern captures everything in front of it very well and will help avoid capturing too much background noise or ambience in your room. Of course, other polar patterns are great for specialized techniques like Mid/Side and the Blumlein technique.
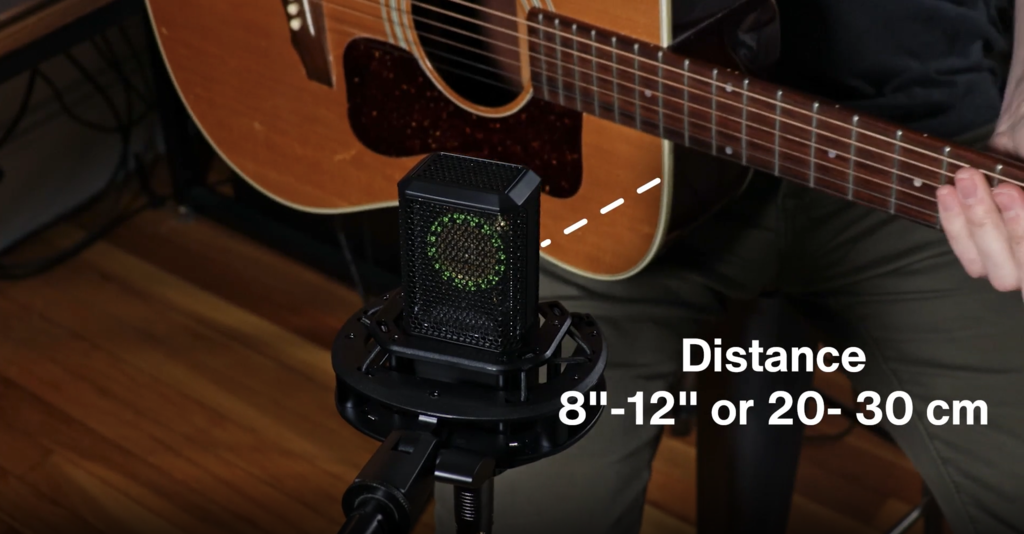
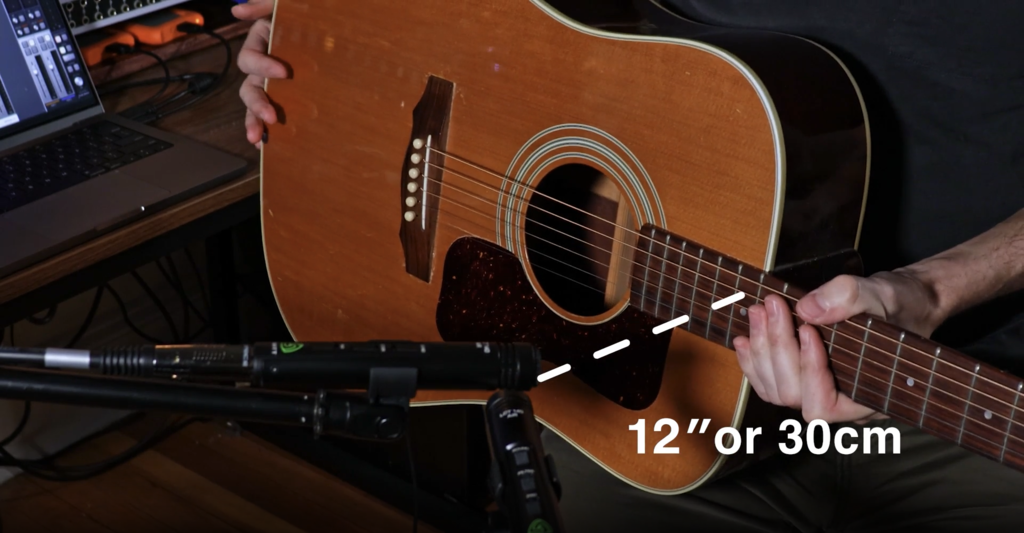
Using a single mic is a great option for use in a dense mix and in situations where you have limited inputs. A great starting point for a single mic placement is to put it about 10-12 inches away from the guitar at the 12th fret or near where the neck meets the body of the guitar. Experiment with angle and exact placement to achieve the desired frequency response. Just avoid putting the microphone directly in front of the sound hole because it will get swamped with low frequencies resonating from the guitar.
Using a stereo microphone technique is great for singer-songwriters, where acoustic guitar is in the front and center of the mix.
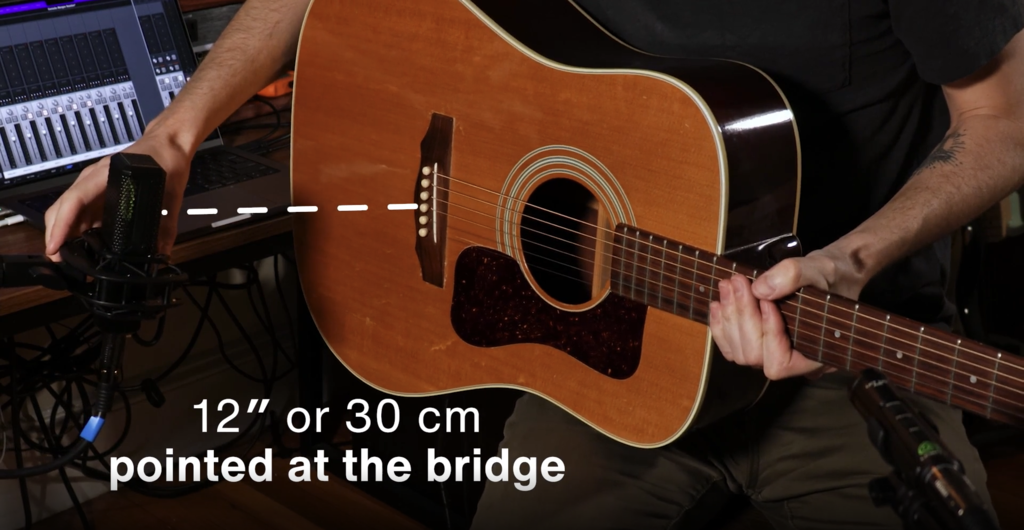
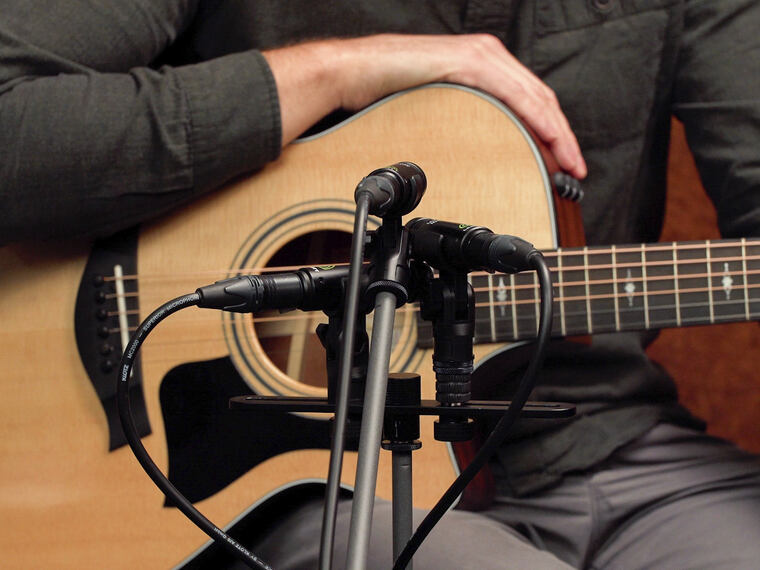
For a spaced pair, I usually use a large diaphragm condenser and a small diaphragm condenser, but a matched pair will also work great. Set up the microphones so that they are about 10-12 inches from the guitar with one pointed at the fretboard and another pointed at the bridge of the guitar. The microphones should be three times further from each other than they are from the guitar to ensure phase coherence and a wide sound stage.
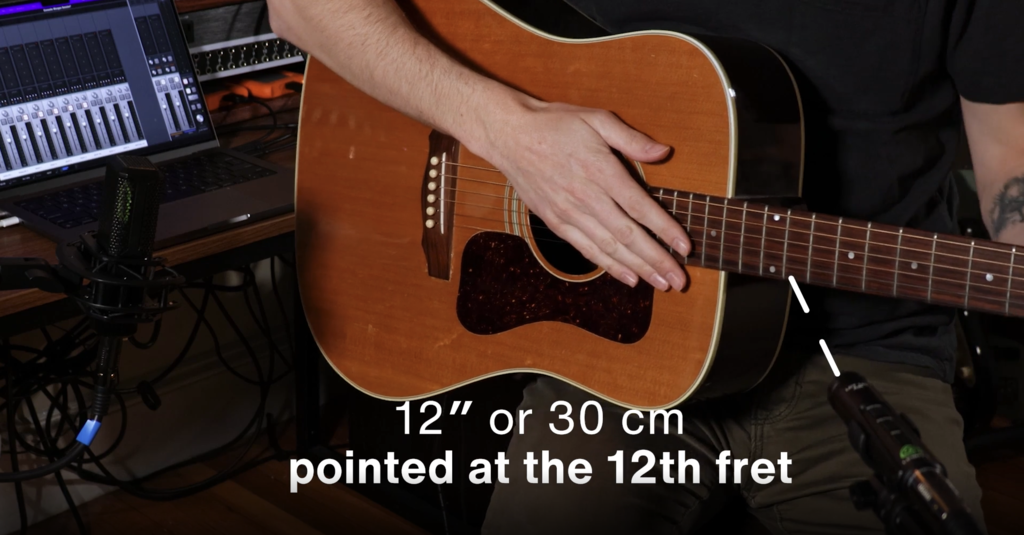
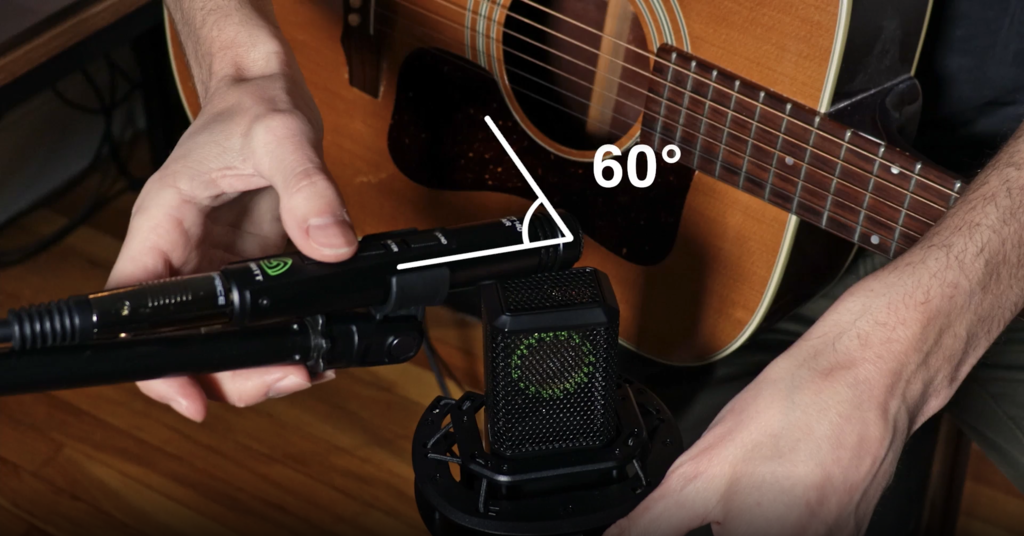
Another popular approach is the XY technique. To do this, you’ll want to use a matched pair of microphones placed at a 90-degree angle from each other and put the capsules as close together as you can to ensure phase coherence. Put the mics about 10-12 inches from where the neck meets the body of the guitar so that one mic points toward the bridge and the other points roughly toward the 7th fret.
Feel free to experiment with these techniques and modify according to your own taste. My favorite technique is a modified XY configuration using a large diaphragm condenser and a small diaphragm condenser. I use a narrower angle or 60 degrees and make sure the large diaphragm points toward the body and the small diaphragm points toward the neck. This gives you a nice, realistic stereo image of the guitar while maintaining a good sense of focus toward the center.
Let's have a listen
Below, you can find different acoustic guitar recordings:
A good rule of thumb for recording levels, is to set the gain on your preamp so the audio peaks on the meter land between –18db and –14db. This allows plenty of headroom for processing and avoiding accidental clipping with dynamic guitar playing. It’s easy to overlook the meters when recording yourself so build in extra safety with good recording level habits.
There’s never been a better time to get great recording quality at home. With a little preparation, experimentation and attention to detail, you can get an incredible acoustic guitar sound that stands up to the best productions out there.
To learn more, check out the blog "What is gain staging?"
Related stories
How to mix acoustic guitar
So you found the perfect microphone and captured a great acoustic guitar recording. Now it’s time to do some additional processing to bring out the best in your…
Stereo recording techniques
Stereo recording is easy and fun. It makes recordings sound more immersive and realistic. In this blog, we’ll take a look at the basics of stereo recording, so…
Acoustic treatment for recording and mixing
Acoustic treatment is one of those topics in audio that just isn't very sexy. You want to use your precious studio budget for fun stuff like a new keyboard or a…
Top 10 tips for recording vocals in a home studio
Vocals can make or break a song. Having a compelling vocal sound is critical to pulling in the listener and getting them to connect with your song. These are my…

